
Let’s do a 6×6 DSP technique today.
I love finding ways to efficiently use my beautiful sheets of 6×6 Designer Series Paper (DSP).
Do you also like DSP and do you have a favourite way of using them in your cards? Do you keep every inch of the leftovers or do you throw them away?
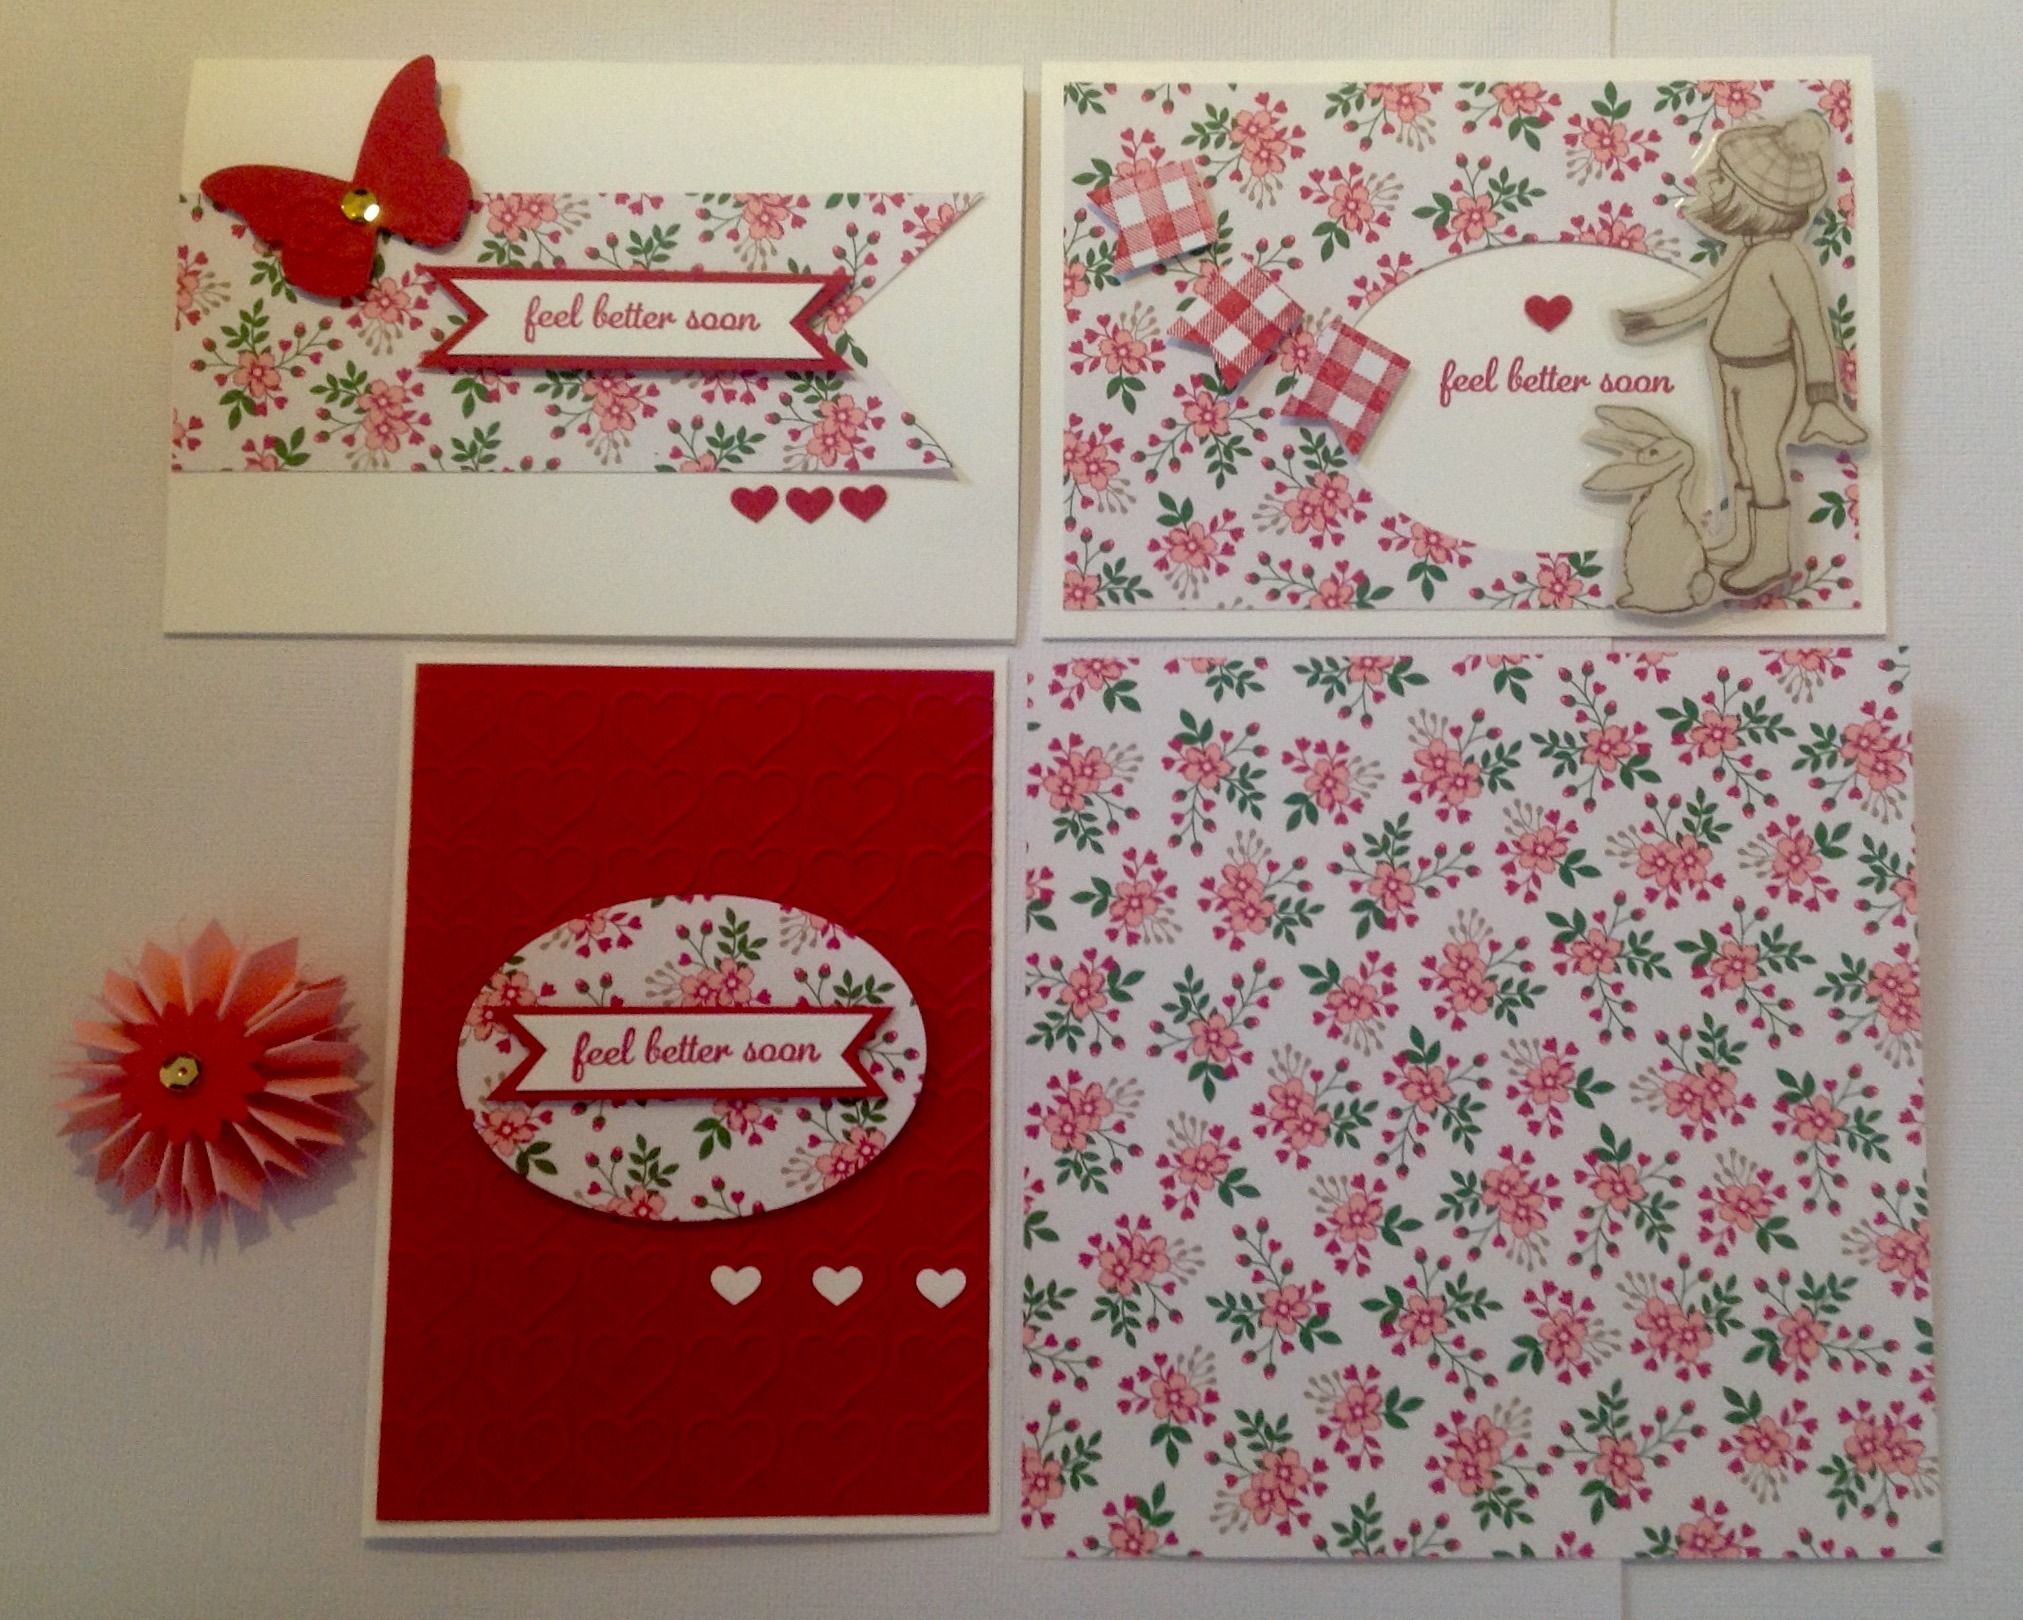
Here’s how I was able to make the 3 cards (refer to photo above) from 1 sheet of 6×6 DSP:
- Trim 2 inches from the side of a DSP and shape it in a banner. Attach the banner on a card base and embellish with a butterfly and a greeting. I shaped the greeting before attaching it to the card. Add embellishments for a finishing touch.
- Next, die cut an oval on the remaining piece of the DSP. Attach the piece with the hole on a card base. Stamp a greeting on the hole. Add embellishments for a finishing touch.
- Lastly, attach the leftover oval on a card front that has been embossed (refer to the red card). Attach a greeting to the oval. Add embellishments for a finishing touch.
I hope that you enjoyed this inspiration and that you’ll give the 6×6 DSP technique a go.
I wonder how you’ll be cutting your DSP? Will you be cutting them smaller or into narrow strips make more than 3 cards out of a single piece? What other projects do you use your DSP for? I use them a lot in my bullet journal and scrapbooking.
Visit the online store for current products to help you in your card making.
Would you like to learn card techniques using Designer Series Paper? Let me know so we can organise a class for you. Bring along your friends too so you can share the experience.