
Christmas card punch art is a fun project for the holidays. Even the kids can participate and I assure you, you will all love it.
Here’s how to make the Santa card:
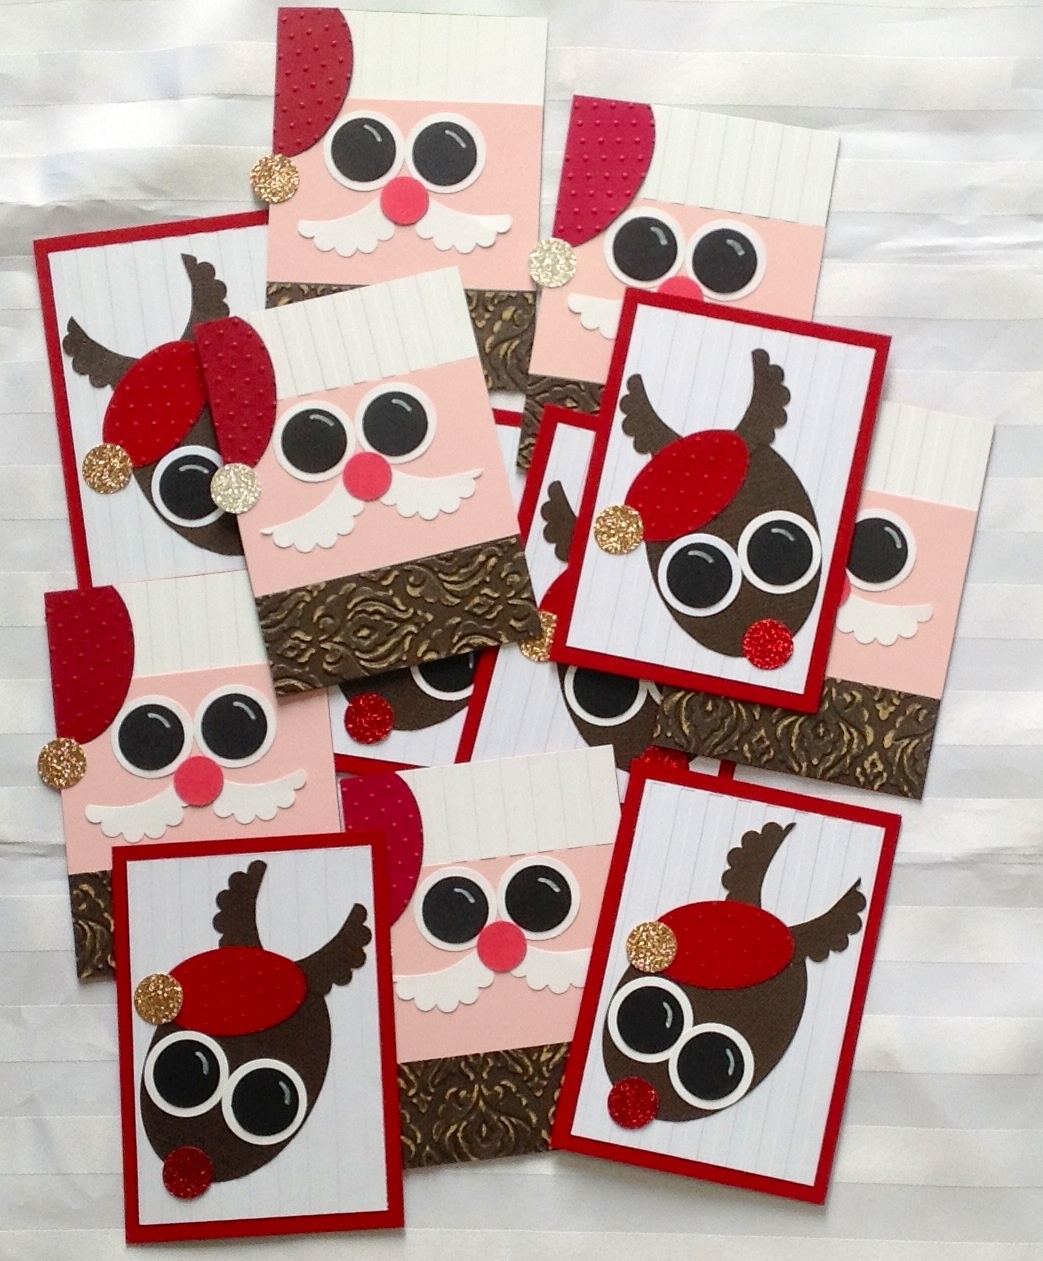
- On a piece of Blushing Bride card base, attach a striped embossed Basic White border on top. At the bottom, attach a Chocolate Chip embossed border (use a swirly design).
- Cut 2 black circles with a circle punch and then cut 2 circles in Basic White (they should be slightly larger than the black circles). Then, use a chalk marker for the eyes. Attach to the card front so that they look like eyes.
- Cut a Basic White circle scallop with a punch. Cut it in half and then shape into a moon shape. Attach this to the card under the eyes so they look like a moustache.
- Cut a small Melon Mambo circle with a punch and then attach on top of the moustache.
- Cut a Cherry Cobbler oval and attach to the top corner of the card. Trim off the excess and then attach a small Silver/ Gold Glimmer Paper circle at the end of Santa’s hat.
Here’s a list of products used:
- Blushing Bride Cardstock
- Cherry Cobbler Cardstock
- Basic White Cardstock
- Melon Mambo Cardstock
- Glimmer Paper
- 1 inch Circle Punch
- 1-3/8 inch Circle Punch
- 3/4 inch Circle Punch
- 1-3/4 inch Circle Scallop Punch
- Extra Large Oval Punch
- White Stampin’ Chalk Marker
I hope that you enjoyed this card inspiration and that you’ll give Christmas card punch art a go.
What other characters can you make using punches? Aren’t they so much fun?
Visit the online store for current products to help you with your card making.
Lastly, would you like to learn card making techniques like this one? Let me know so we can organise a class for you. Bring your friends too so you can share the experience.