
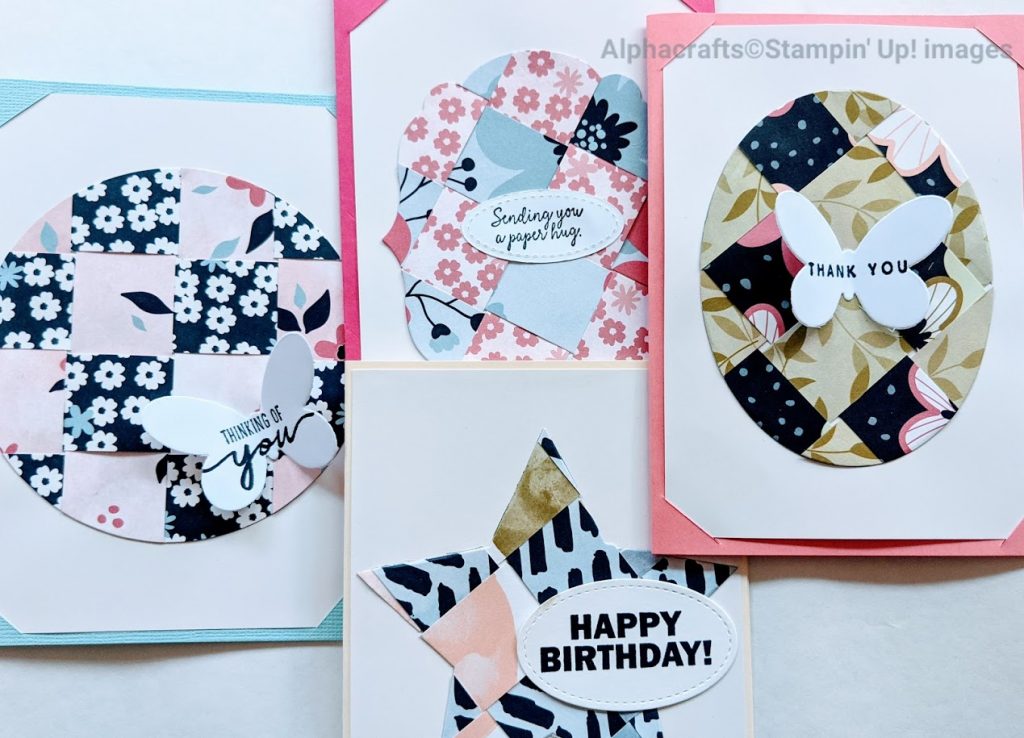
Paper Weaving technique is a perfect project for our beautiful double-sided Designer Series Paper (DSP).
Here’s how:
- First, choose your paper. It’s best to use double-sided paper so that the colour coordination has been worked out for you. You will need 2 square sheets cut into 4 x 4 inches.
- Second, trim the papers into strips. They can be as narrow or as wide as you like. I recommend trimming evenly in 1 inch strips.
- Third, lay the strips flat and weave as you would a basket. Make sure that you adhere the ends with glue so that the strips don’t fray or separate.
- Lastly, shape your woven sheet using dies. I find that circles complement the weaves perfectly but it’s your choice as to what will suit your card.
If you want to add a greeting to your card, stamp it onto a separate piece of paper. Something 3-dimensional will complement this technique, such as a butterfly (see sample above).
Also, try this technique on smaller cards or notecards for a daintier look. Instead of trimming into 1 inch strips, try 1/2 inch.
I used the Stitched Shapes Dies to cut out the shapes. The set has different shapes and sizes to choose from.
Check out the online store for current products to help you with the Paper Weaving technique.
Would you like to learn this in class? Let me know so we can organise one for you. Bring along your friends too so you can share the experience.
Are you also looking for other fun papercraft projects? Check out my events page and book in. There’s always something new to learn.