
Embossing techniques are fun to learn. Warning: it’s so fun that it’s habit-forming. Once you start, it’s hard to stop.
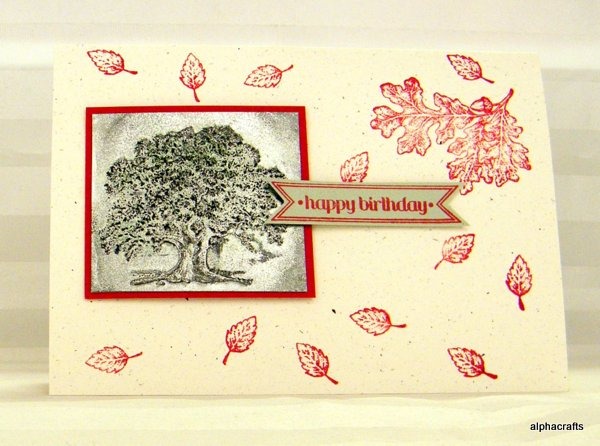
Technique 1 – Stamping on heated powder.
- On a sheet of Basic White cardstock, ink a clear-mount block with Versamark, sprinkle silver embossing powder and then heat. Repeat this process 3 or 4 times until a thick surface of heated powder is formed. On the last heating, stamp an image while it is still wet because the stamp has to leave an imprint when pushed into the pool of heated silver.
- Use a sponge dauber and pick up Black StazOn and paint it over the image.
- Trim into a square and attach to a coloured cardstock and then attach this to a card base.
- Add a greeting and embellish as a finishing touch.
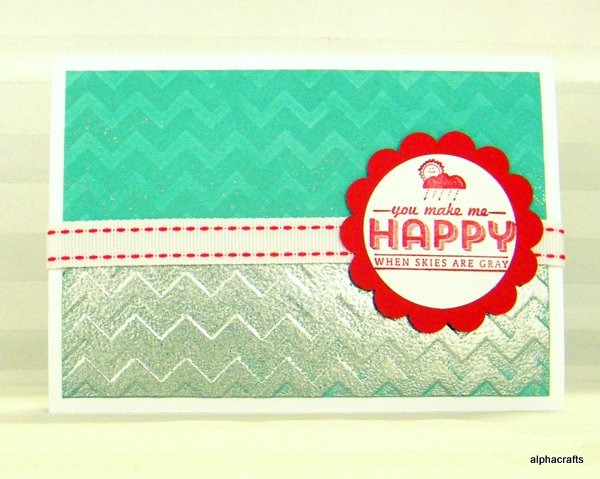
Technique 2 – Stamping on an embossing folder.
- Ink an embossing folder with Versamark but leave the other half uninked.
- Insert a coloured card front and run it through the Cut and Emboss Machine. There should be Versamark and an imprint now attached to the cardstock.
- Sprinkle silver embossing powder to the inked area and then heat set with a heat tool.
- Attach this to a card base and embellish with a greeting and a ribbon as a finishing touch.
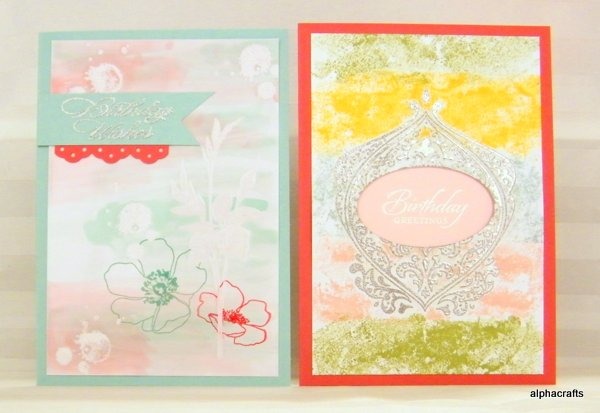
Technique 3 – Watercolour embossing
- On a Shimmery White card front, stamp flowers in different colours.
- Next, stamp leaves or branches in Versamark and then sprinkle with clear embossing powder. Heat set with a heat tool.
- Transfer ink to a clear-mount block and then pick up the ink with a water painter. Paint the whole surface until the embossed areas appear. Use different colours so that it looks like a painting.
- Add a greeting and embellishments as a finishing touch.
Here’s a list of products I used:
- Basic White A4 Cardstock
- Shimmery White A4 Cardstock
- Silver Embossing Powder
- Clear Embossing Powder
- Heat Tool
- Versamark
- Water Painter
- StazOn
I hope that you enjoyed this inspiration and that you’ll give embossing techniques a go.
Visit the online store for current products to help you with your card making.
Lastly, would you like to learn techniques in card making? Let me know so we can organise a class for you. Bring along your friends too so you can share the experience.